Emergency Home Repairs in Edmonton: What to Do When Disaster Strikes

Disasters don’t wait for a convenient time. Whether it’s a sudden storm, a burst pipe, or unexpected fire damage, emergency home repairs require quick action to prevent further damage and keep your home safe. For Edmonton homeowners, understanding what to do in these high-pressure situations is crucial.

Here’s a guide to help you respond effectively when disaster strikes.

1. Assess the Immediate Danger

Before anything else, ensure the safety of everyone in your home. For emergencies like electrical fires, severe flooding, or structural collapses, evacuate immediately and call emergency services. Your safety always comes first.

2. Stop the Source of Damage

When it’s safe to do so, stop the source of the damage:

  • Burst pipes? Shut off your home’s main water valve.
  • Electrical issues? Turn off power at the breaker.
  • Roof leaks? Use tarps or buckets to manage water infiltration until professional help arrives.
  • Acting quickly can prevent a small emergency from escalating into a major restoration project.

3. Document the Damage

Take photos and videos of all affected areas. This documentation is essential for insurance claims and helps contractors assess the full extent of the repairs needed. Be thorough—capture structural damage, soaked drywall, flooring issues, and personal property losses.

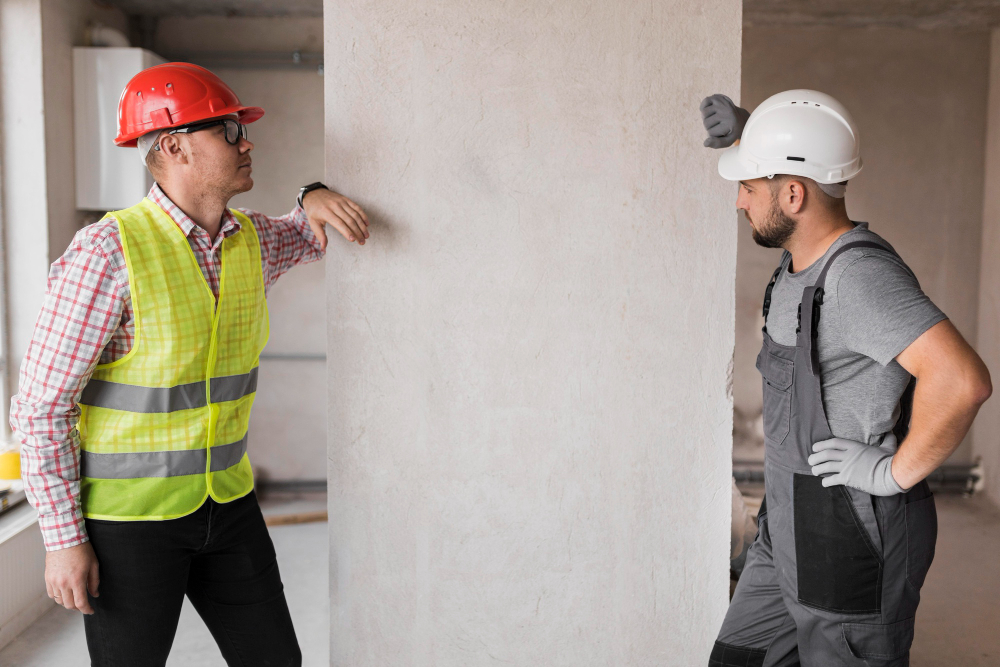
4. Call an Emergency Repair Contractor

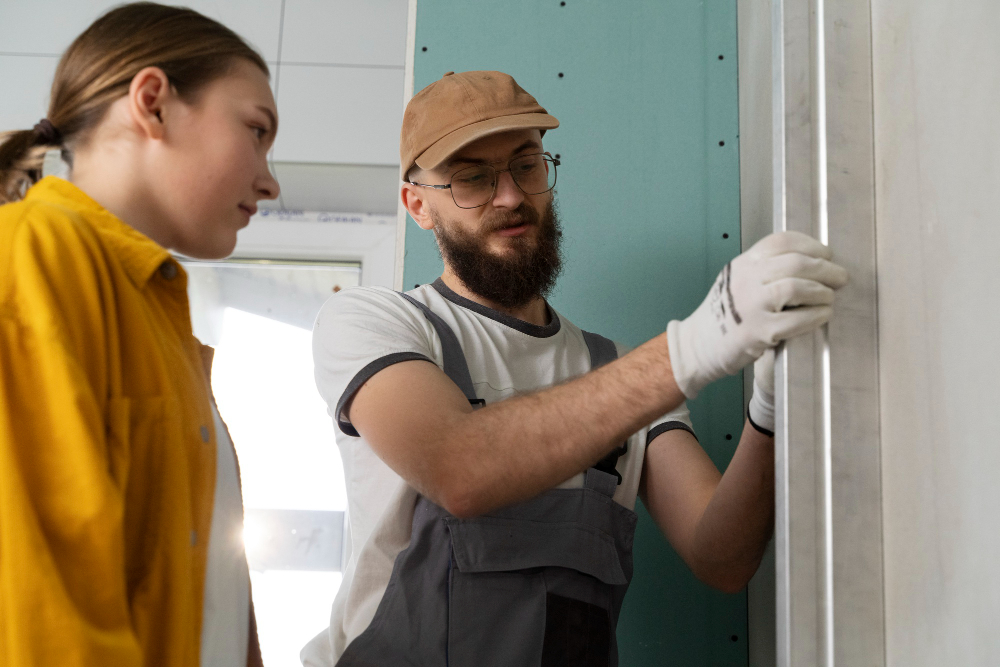
Don’t wait. Contact a trusted Edmonton emergency home repair service (like Bakir Contracting) as soon as possible. We’re equipped to handle urgent repairs with efficiency, whether it’s water extraction, board-ups, or structural reinforcement.

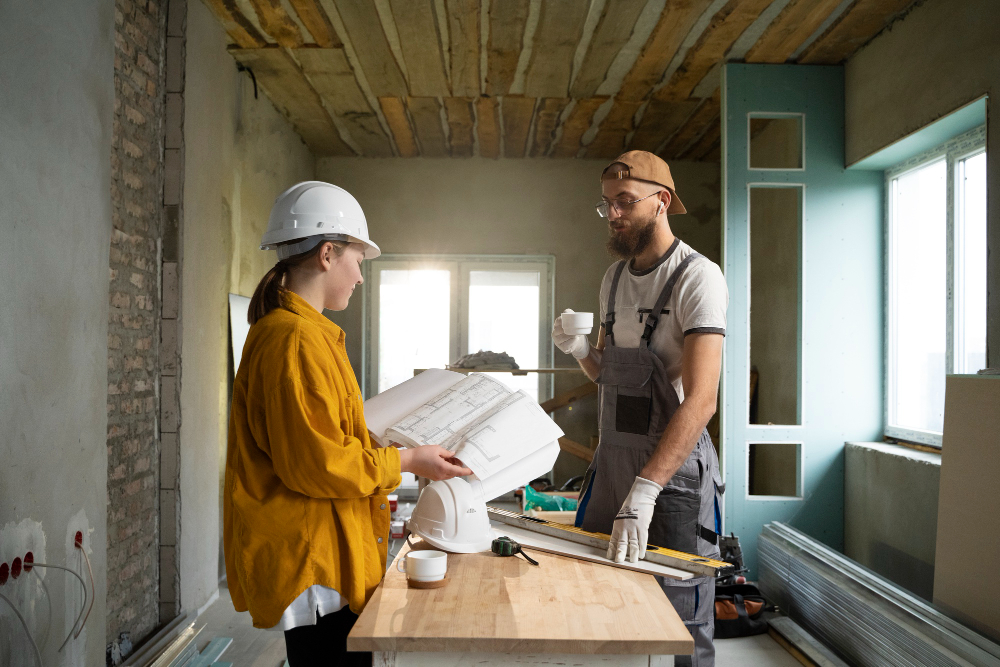
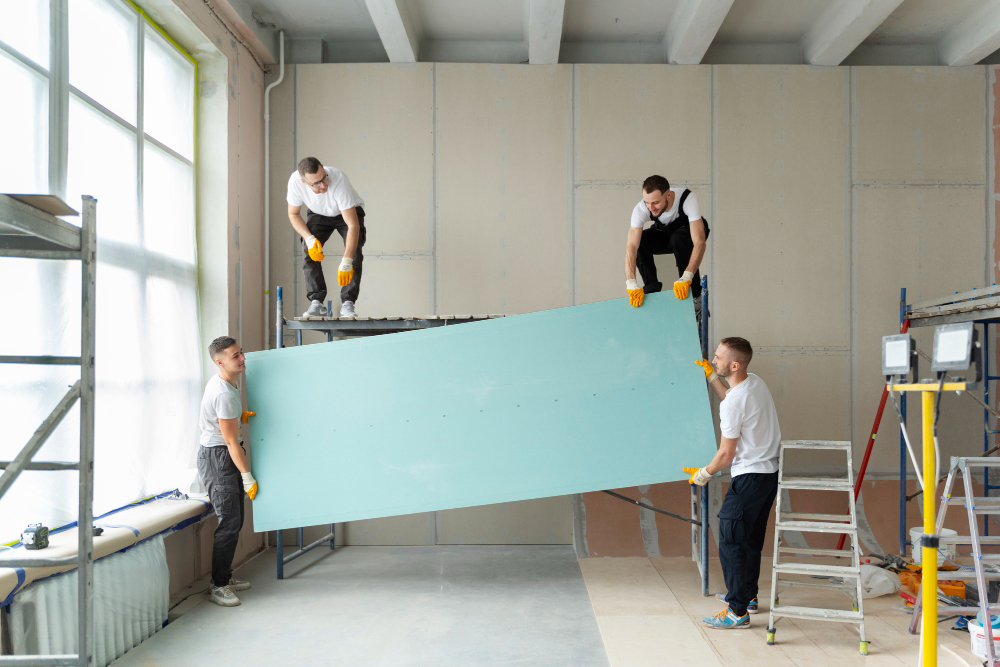
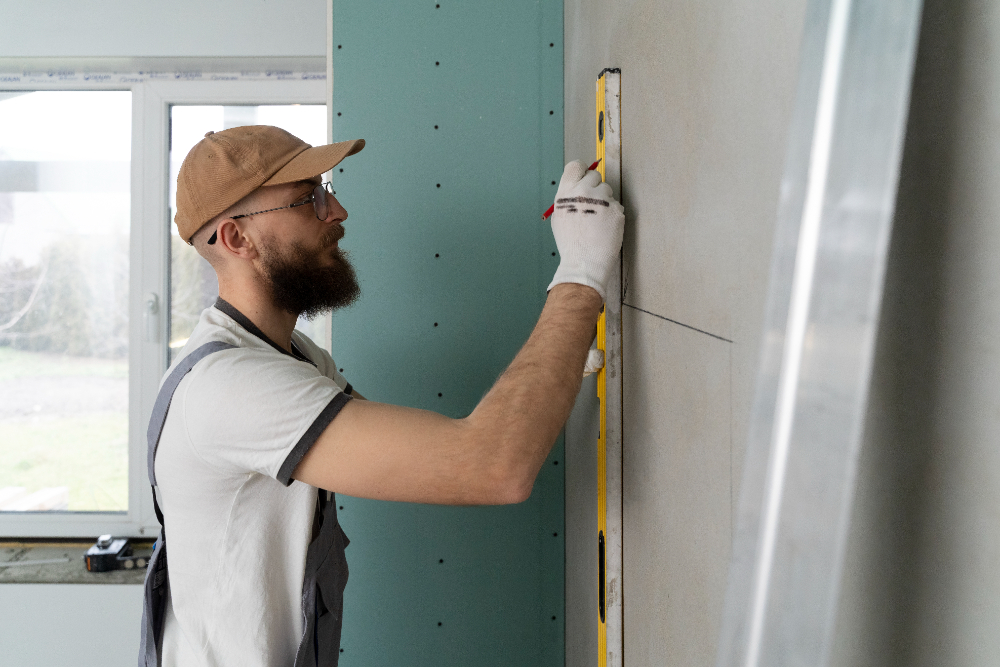
5. Prioritize Repairs

  • Emergency home repairs typically happen in stages:
  • Containment: Preventing further damage (e.g., roof patching, water removal)
  • Mitigation: Drying, cleaning, and stabilizing affected areas
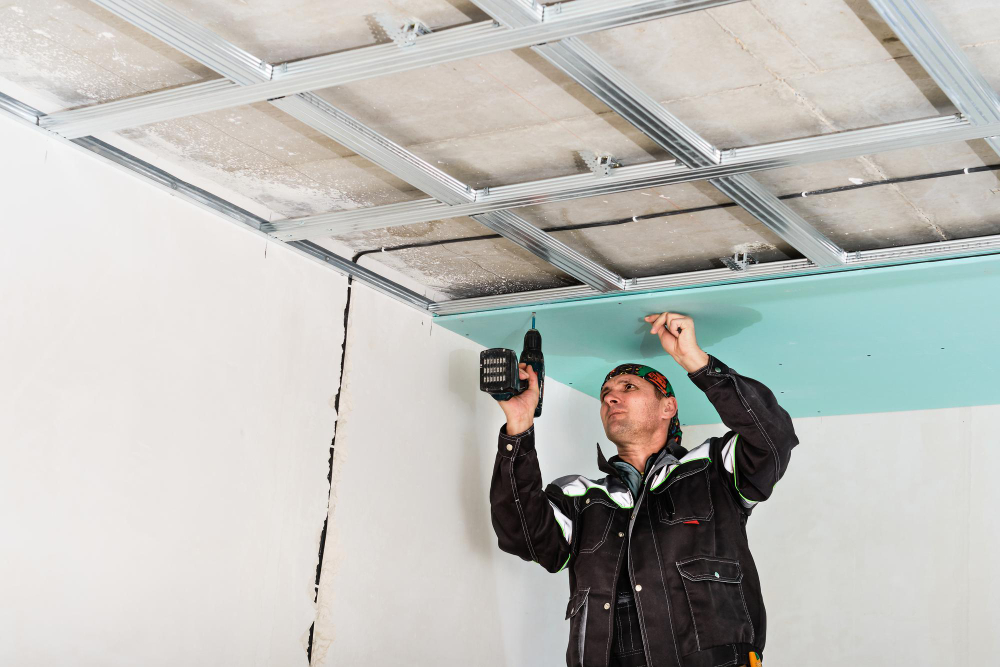
  • Restoration: Full repairs of drywall, flooring, insulation, and cosmetic finishes
  • A professional contractor will guide you through this process and ensure your home is restored safely and effectively.

6. Prevent Future Emergencies

  • Once immediate repairs are completed, consider preventive measures:
  • Regular inspections of roofing, plumbing, and electrical systems
  • Upgrading materials to more durable, moisture-resistant options
  • Installing sump pumps, backwater valves, and surge protectors
  • In Edmonton’s climate, proactive maintenance is a smart investment.

Common Emergency Repairs We Handle in Edmonton:

  • Urgent Home Repairs
  • Storm Damage Restoration
  • Emergency Plumbing Services
  • Fire Damage Repair

From water-damaged drywall to full-scale structural repairs, Bakir Contracting is your go-to expert for fast and reliable emergency home services.

Why Edmonton Homeowners Trust Bakir Contracting:

Rapid response times

Transparent estimates

Quality craftsmanship

Familiarity with local insurance procedures

We understand the urgency of emergency repairs and work swiftly to restore your home while minimizing stress.

Related Services:

General Contracting Services

Emergency Water Damage Restoration

Full-Service Home Repairs

Drywall vs. Plaster: Which Is Better for Your Edmonton Home?

Trying to decide between drywall and plaster for your Edmonton home? Discover the pros, cons, and local considerations to help you choose the best option for your renovation or build.

1: Drywall vs. Plaster: Which Is Right for Your Edmonton Home?

When it comes to home renovation or new construction in Edmonton, one common question homeowners face is whether to choose drywall or plaster for their interior walls. Both materials have been widely used in Canadian homes, but each comes with its own set of benefits and drawbacks. In this article, we’ll break down the differences and help you determine which material is best for your specific needs.

2: What Is Drywall?

Drywall, also known as gypsum board or sheetrock, is a modern wall material composed of gypsum sandwiched between two paper sheets. It’s the most commonly used wall material in homes today due to its affordability, ease of installation, and smooth finish.

Key Benefits of Drywall:

  • Quick and easy installation
  • Cost-effective
  • Ideal for insulation and soundproofing
  • Easy to repair or replace
  • Compatible with various finishes (paint, wallpaper, texture)

2: What Is Plaster?

Plaster is a more traditional wall finish that involves applying multiple coats of a wet mixture (often lime, gypsum, or cement-based) over a lath or solid surface. While plaster was widely used in homes built before the 1950s, it’s now considered a specialty finish in modern construction.

Key Benefits of Plaster:

  • Highly durable and long-lasting
  • Provides a hard, dense surface
  • Excellent for ornamental details and texture
  • Superior sound insulation

Drywall vs. Plaster: Side-by-Side Comparison

Feature Drywall Plaster
Installation Time Fast Time-consuming
Cost Lower Higher
Finish Flexibility High Medium
Durability Moderate High
Soundproofing Good Excellent
Repair & Maintenance Easy Difficult
Aesthetic Options Smooth, modern look Textured, classic look

Considerations for Edmonton Homeowners

Climate Suitability: Edmonton’s cold winters and dry indoor air can impact how wall materials perform. Drywall expands and contracts slightly with temperature and humidity fluctuations but is generally stable. Plaster can develop hairline cracks over time in dry conditions if not properly maintained.

Renovation vs. New Construction: For older homes with existing plaster, preserving or repairing it may be the best choice for maintaining architectural integrity. However, in most new construction or remodeling projects, drywall is more cost-effective and time-efficient.

Availability & Local Expertise: In Edmonton, drywall services are widely available and affordable. While some contractors still offer plaster services, they tend to be more specialized and expensive due to the skill involved.

So, Which Should You Choose?

If you’re looking for a cost-effective, modern, and versatile option for your walls, drywall is likely your best bet. It’s easy to install, repair, and decorate. On the other hand, if you’re restoring an older home or want a more textured, high-end finish, plaster might be worth the investment.

Need Help Deciding? Contact Edmonton’s Drywall Experts

At Bakir Contracting, we’ve helped countless Edmonton homeowners make the right decision for their walls—whether it’s installing brand-new drywall or upgrading old surfaces. Our expert team is ready to guide you through the process and deliver exceptional results.

Contact us today to schedule a free consultation for your drywall or renovation project in Edmonton!

Top Signs Your Home Needs Foundation Repair Before It’s Too Late

Wall Paint

A solid foundation is the backbone of a safe and long-lasting home. Yet, foundation problems often go unnoticed—until it’s too late. For homeowners in Edmonton, where shifting soil and harsh weather conditions are common, understanding the signs of foundation damage is crucial.

At Bakir Contracting, we’ve seen how early detection can save homeowners thousands of dollars in repairs. In this article, we’ll walk you through the top warning signs your home may need foundation repair, and explain when to call a contractor for foundation repair in Edmonton.

Why Foundation Issues Happen in Edmonton

Edmonton’s unique climate—with its freeze-thaw cycles and clay-heavy soil—can put stress on your home’s foundation. When moisture levels fluctuate dramatically, the ground expands and contracts, leading to cracks, sinking, or shifting.

Knowing what to look for can help you catch problems early and protect your investment.

1. Cracks in Walls, Floors, or Ceilings

Not all cracks are cause for concern, but if you notice:

  • Wide horizontal or stair-step cracks in your foundation or drywall
  • Cracks above doors or windows
  • Expanding floor gaps

These may signal foundation movement and need immediate attention.

2. Uneven or Sloping Floors

Do your floors feel like they’re tilting? Use a level or a marble to test slope. If your floor isn’t level, it may be due to a shifting or settling foundation.

This is one of the most common foundation issues in Edmonton homes, especially in older neighborhoods or areas with poor drainage.

3. Doors and Windows That Stick or Don’t Close Properly

If interior doors begin to jam or windows won’t close like they used to, your house may be settling unevenly. This puts pressure on door and window frames, causing misalignment.

Persistent sticking is a red flag worth investigating.

4. Gaps Between Walls, Ceilings, or Cabinets

Visible gaps between:

  • Walls and ceilings
  • Cabinets and walls
  • Exterior bricks or siding

These separations indicate that parts of your home are moving independently—a classic sign of a failing foundation.

5. Water Pooling Around the Foundation

Excess water near your foundation can lead to erosion or hydrostatic pressure, both of which can cause cracks or sinking. If you notice puddles or soggy soil near the base of your home, it’s time to improve drainage—or risk foundation damage.

6. Basement or Crawl Space Moisture

A damp, musty basement could be more than just a ventilation issue. Water infiltration through cracks in the foundation walls or slab may signal structural compromise. Over time, this can lead to mold, mildew, and costly repairs.

7. Bowed or Bulging Foundation Walls

If your foundation walls are bulging inward or appear bowed, this may indicate extreme pressure from the surrounding soil. This is a serious issue that requires professional foundation repair in Edmonton.

When to Call a Contractor for Foundation Repair

If you’ve noticed one or more of the signs above, don’t wait. Foundation problems rarely fix themselves—and delays can lead to major structural damage.

Contact a contractor if:

  • Cracks are widening
  • Structural shifts are getting worse
  • Floors are uneven or sagging
  • Water leaks are present

At Bakir Contracting, we provide thorough inspections, honest assessments, and long-lasting foundation repair solutions across Edmonton.

Protect Your Home with Expert Foundation Repair

Early intervention is the key to avoiding extensive repairs. If you’re unsure whether your home is showing signs of foundation trouble, don’t take chances.

  • Free on-site evaluation
  • Licensed and experienced team
  • Custom repair plans built for Edmonton homes

Contact Bakir Contracting today to schedule your foundation inspection and protect your home before it’s too late.

How to Plan a Successful Home Renovation in Edmonton: Step-by-Step Guide

Planning a home renovation in Edmonton? Whether you’re updating your kitchen, finishing your basement, or doing a full home remodel, having a solid renovation plan is essential for a smooth, stress-free experience. At Bakir Contracting, we’ve helped countless homeowners transform their spaces with precision and care.

In this guide, we’ll walk you through the essential steps for home renovation to help you avoid common pitfalls and ensure your project is a success.

Step 1: Define Your Renovation Goals

Before reaching out to contractors or looking at Pinterest boards, get clear on what you want to achieve.

  • Are you renovating to increase resale value?
  • Do you want to improve functionality or aesthetics?
  • Are there any structural or safety issues that need addressing?

Tip: Write down a list of “must-haves” vs. “nice-to-haves.” This will help you stay focused and manage your budget.

Step 2: Set a Realistic Budget

A home renovation can be a significant investment. Knowing your budget upfront helps determine the scale of your project and what materials or finishes you can afford.

Include estimates for:

  • Labor and materials
  • Permits and inspections
  • Unexpected costs (always leave a buffer of 10–20%)

Bonus Tip: Contact a local contractor like Bakir Contracting for an accurate quote tailored to Edmonton pricing.

Step 3: Research and Hire the Right Contractor

Choosing the right general contractor is one of the most important decisions in your renovation journey. Look for a company with:

  • Proven experience in Edmonton home renovations
  • Positive reviews and testimonials
  • Licensed and insured services
  • Clear communication and detailed contracts

We recommend interviewing at least two or three contractors and comparing estimates. Be wary of quotes that seem too good to be true.

Step 4: Create a Detailed Renovation Plan

Your contractor should work with you to develop a comprehensive renovation plan that includes:

  • Project timeline
  • Materials selection
  • Permit requirements
  • Step-by-step construction phases

A detailed plan ensures everyone is on the same page and reduces the risk of delays or miscommunication.

Step 5: Secure Permits and Approvals

In Edmonton, many renovations (especially structural changes or electrical/plumbing work) require building permits.

Step 6: Prepare Your Home

Depending on the scope of work, you may need to:

  • Clear furniture and valuables
  • Set up a temporary kitchen or bathroom
  • Plan for noise and dust

If the renovation is extensive, consider whether you’ll stay in the home or temporarily relocate.

Step 7: Monitor the Progress

While your contractor will manage the day-to-day, it’s important to stay involved:

  • Schedule regular check-ins
  • Track milestones against the project timeline
  • Address concerns early to avoid larger issues late

Step 8: Final Walkthrough and Inspection

Once the renovation is complete, walk through the finished space with your contractor.

  • Make a list of any touch-ups or adjustments needed
  • Ensure all building codes and safety standards have been met
  • Keep all receipts and warranty documents

At Bakir Contracting, we pride ourselves on client satisfaction and always ensure every detail is up to your expectations.

Edmonton Renovation Checklist Summary

Here’s a quick Edmonton renovation checklist to help you stay on track:

  •  Set renovation goals
  • Establish a realistic budget
  • Choose a reputable Edmonton contractor
  • Develop a detailed project plan
  • Obtain necessary permits
  • Prepare your home
  • Monitor progress
  • Do a final walkthrough

Ready to Start Your Renovation in Edmonton?

Bakir Contracting is your trusted partner for professional home renovations in Edmonton. From kitchens and bathrooms to complete home makeovers, we deliver quality craftsmanship and stress-free project management.

Contact us today for a free consultation and take the first step toward your dream home!

The Ultimate Guide to Drywall Installation: Expert Tips & Industry Secrets

Drywall might not be glamorous, but it’s the backbone of a polished, modern home. Whether you’re diving into a full home renovation or simply upgrading a single room, mastering (or hiring for) proper drywall installation makes all the difference. From choosing the right materials to avoiding common pitfalls, this guide gives you everything you need to level up your space—without leveling your budget. If you want results without the guesswork, our drywall and taping pros are ready to help: https://bakircontracting.com/drywall-and-taping/

What You Need to Know About Drywall Installation

At first glance, drywall may seem straightforward—but great results come from attention to detail. Here’s a breakdown of what the process actually involves:
– Prep the Frame: Double-check your studs for alignment and spacing.
– Measure Twice, Cut Once: Accurate cuts using a T-square and utility knife prevent costly waste.
– Secure with Confidence: Screws should be spaced properly and sunk just below the surface—no breaking the paper.
– Tape & Mud Like a Pro: Seamless joints come from patient layering, not rushing the compound.
– Sanding for Smoothness: Don’t skip sanding between coats—it’s the secret to that “invisible wall” look.
Understanding these steps helps you avoid headaches and makes your drywall strong, seamless, and ready for the next design layer.

Common Mistakes to Avoid in Drywall Installation

Here’s where most DIY projects go sideways—and how you can stay on track:
– Mis-measuring Panels: Wasted boards and bad fits are usually the result of rushed measuring.
– Wrong Fastening Method: Using too many screws? Not enough? Both can weaken the structure.
– Sloppy Finishing Work: Skipping sanding or layering mud too thick results in bumpy, uneven walls.
– Ignoring Moisture Control: In rooms like bathrooms or basements, skipping waterproof drywall is a major no-no.
Want to skip the trial and error? Professional drywall services take these risks off your plate.

The Best Tools and Materials for Drywall Installation

Tools aren’t just tools—they’re your drywall success kit. Here’s what every installer should keep nearby:
– Sharp Utility Knife: Clean cuts every time.
– T-Square: Essential for square edges and accurate panels.
– Cordless Drill with Drywall Bit: Keeps depth consistent and speed high.
– Drywall Saw: Perfect for outlet and fixture cutouts.
When it comes to materials, picking the right drywall for the right room is key:
– Standard Panels: Great for bedrooms, hallways, or living rooms.
– Moisture-Resistant Boards: Non-negotiable in high-humidity areas like bathrooms, laundry rooms, or during vanity and sink replacements.
Pairing smart tools with the right drywall helps you stay ahead of potential issues—especially when combining with other upgrades like lighting and fixture installation or shower and tub installation.

DIY vs. Professional Drywall Installation: What’s the Better Move?

We get it—DIY is tempting. But there are pros and cons to weigh before committing:

DIY Advantages:

– You’ll save on labour costs.
– Flex your skills and gain hands-on experience.

DIY Drawbacks:

– It’s time-intensive.
– Mistakes are common (and sometimes expensive).
– You’ll need to invest in tools and supplies.

Professional Drywall Services Provide:

– A flawless finish the first time
– Faster turnaround, especially if paired with plumbing and waterproofing or tiling work
– Knowledge of complex layouts and moisture-prone spaces like bathrooms
Bottom line? If you’re on a tight timeline or juggling other trades, a pro ensures seamless integration with other home improvement projects.

How to Maintain Your Drywall for Long-Lasting Results

Installed right, drywall can last for decades—but only if you show it some love:
– Inspect Annually: Look for dents, cracks, or bubbling near moisture sources.
– Handle Moisture Smartly: Keep rooms well-ventilated, especially after bathroom tiling services or if you’ve added luxury features like steam showers.
– Quick Touch-Ups: Patch minor dings before they grow into major repairs.
– Update Finishes: A fresh coat of paint or a new texture can completely refresh a space and keep your drywall looking modern.
Good drywall doesn’t just exist—it supports your space and style for the long haul, especially when part of larger transformations involving interior design trends or space optimization strategies.

Final Thoughts

Drywall may be behind the scenes, but it’s one of the most visible elements in your home. Done right, it creates the perfect canvas for everything from bold paint to custom tilework. Whether you’re diving into a full luxury bathroom feature upgrade or refreshing a single wall, precision drywall work matters.
Ready to level up your walls? Explore our expert drywall services here: https://bakircontracting.com/drywall-and-taping/ and let’s build something solid.

Drywall Taping: Why It’s Essential for a Smooth Finish

When it comes to achieving flawless walls, drywall taping is where the real magic happens. It’s the difference between a wall that looks professionally finished and one that highlights every seam, joint, and imperfection. Whether you’re prepping a new build or renovating an existing room, understanding the importance of drywall taping can make or break the final outcome.

What is Drywall Taping and Why is it Important?

Drywall taping involves covering the joints between drywall panels to create a smooth, continuous surface. The tape, combined with joint compound, seals gaps, hides seams, and provides the base layer for a perfect finish.

This step is essential not only for aesthetics but also for structural durability. Proper drywall joint sealing prevents cracks, supports surface strength, and ensures better performance during seasonal expansions and contractions.

Different Types of Drywall Tape and Their Uses

Choosing the right tape for the job makes a noticeable difference. Here’s what to know:

Paper Tape vs. Mesh Tape:
– Paper tape has a solid track record for strength and is ideal for straight seams and joints.
– Mesh tape is self-adhesive and great for quick fixes or beginners, but it typically needs a setting-type compound to prevent cracks.

Corner Beads and Joint Tape:
– Use metal or plastic corner beads for sharp, durable corners.
– Joint tape reinforces seams and helps maintain a uniform, flat surface.

Selecting the right products ensures seamless wall finishing techniques that stand the test of time.

Step-by-Step Guide to Taping Drywall Like a Pro

Want that pro-level finish? Here’s the taping process broken down:

1. Prep the surface: Make sure seams are clean and dust-free.
2. Apply the first layer of joint compound.
3. Press the tape into the compound, smoothing it with a knife.
4. Let it dry fully before adding additional coats.
5. Add two or three more coats of compound, feathering each one out wider.
6. Sand gently between coats until the surface is completely smooth.

Patience is key here. Rushing the process leads to ridges, bubbles, or uneven layers that ruin the final result.

Common Mistakes in Drywall Taping and How to Avoid Them

Even small missteps in drywall taping can show up after paint goes on. Here are the most common mistakes to avoid:

Overusing Joint Compound:
– Applying too much mud can result in bulky seams that require excessive sanding.

Skipping the Sanding Process:
– Skipping or rushing sanding leads to visible edges and inconsistencies, especially after painting.

Using the Wrong Tape:
– Mesh tape in high-stress areas without setting compound can crack over time.

Drywall mud techniques require a balanced approach: apply just enough, smooth it carefully, and allow proper drying time.

The Role of Drywall Taping in Achieving a Professional Paint Finish

If your end goal is a clean, crisp paint job, drywall taping sets the stage. Well-sealed joints ensure that paint goes on evenly, and the wall surface stays blemish-free. Proper residential wall preparation with smooth seams prevents dips or bulges that catch the light post-paint.

This attention to detail is essential for interior painting, especially in high-visibility areas like living rooms, hallways, or entryways. Professional taping services often include full surface preparation to guarantee that the paint finish looks as flawless as the drywall underneath.

Conclusion

Drywall taping isn’t just a step—it’s the foundation for a beautiful, professional-looking wall. Whether you’re planning a renovation or building from scratch, investing in proper taping makes a lasting difference. If you’re aiming for seamless finishes, solid structure, and paint-ready walls, quality taping should never be overlooked.

Need help getting the job done right? Professional taping services ensure your drywall finish is smooth, strong, and ready for any topcoat.

Common Drywall Repair Issues and How to Fix Them

Drywall is one of the most common building materials used in modern homes—and because of that, it’s also one of the most frequently damaged. From minor dings to serious holes, drywall damage happens. The good news? Most issues can be fixed with the right approach, tools, and timing. In this guide, we’ll cover the most common drywall repair problems and what to do about them, whether you’re a DIYer or someone who prefers to leave it to the pros.

Signs That Your Drywall Needs Repair

Knowing when to act is half the battle. Keep an eye out for these common indicators that your drywall needs attention:

– Visible cracks running along seams or corners
– Small to medium holes caused by impact or hardware removal
– Dents from furniture or door handles
– Water stains or sagging from leaks (especially on ceilings)
– Bubbling paint or texture that indicates underlying damage

These signs suggest it’s time for a quick wall repair—or in some cases, a full section replacement to maintain your home’s structural integrity and aesthetic.

How to Fix Minor Drywall Damage Yourself

Not all drywall problems require a professional. If the damage is small, these steps can help you handle it yourself:

Small Hole Repairs:
– Clean the area
– Apply spackle or lightweight joint compound
– Smooth it with a putty knife
– Let it dry completely, then sand and paint

Crack Prevention:
– Use fiberglass mesh tape over the crack
– Cover with a thin layer of joint compound
– Sand after drying, and reapply if necessary for a flush finish

These methods work well for basic drywall patch jobs and help prevent further wall damage.

When to Call a Professional for Drywall Repair

Some drywall damage goes beyond what a weekend repair kit can handle. Here’s when it’s best to bring in professional drywall repair services:

– Large holes or structural damage to framing
– Water damage affecting ceiling sections
– Signs of mold or rot behind the drywall
– Consistent cracking even after previous fixes
– Projects requiring plaster wall fixes or texture matching

In these cases, calling a pro ensures the problem is addressed safely and completely, while preserving the value and safety of your property.

The Best Materials for Drywall Repair

A solid repair starts with the right materials. Here’s what you need to know:

Joint Compound vs. Spackle:
– Use spackle for small nail holes or minor dents
– Opt for joint compound when taping seams, repairing cracks, or patching larger holes

Sanding Techniques:
– Use a sanding sponge or fine-grit sandpaper
– Sand between coats for a smooth, even surface
– Avoid over-sanding, which can thin the patch and create more work

Matching the repair to the surrounding wall texture is often the trickiest part—especially with older homes. This is where expert services like texture matching and interior wall restoration come in handy.

Cost-Effective Ways to Repair and Maintain Drywall

Maintaining your walls doesn’t have to be expensive. Here are some smart strategies to stretch your budget:

– Catch small issues early before they become costly repairs
– Use repair kits for basic fixes to avoid labor costs
– Repaint patched areas to blend the finish and add protection
– Regular home maintenance helps identify issues before they spread
– Hire pros strategically—call for ceiling repair or deep crack sealing, but DIY the small stuff

By combining smart DIY home repairs with targeted professional help, you’ll maintain your drywall’s integrity and appearance without overspending.

Conclusion

Drywall damage is nearly inevitable in any home—but it doesn’t have to become a major issue. From small dings to deeper repairs, knowing when and how to act can save you money, time, and stress. If you’re dealing with stubborn cracks, water damage, or a ceiling that needs serious attention, professional drywall repair is the best route.

Want it done right the first time? Reach out for expert support with everything from wall repair to interior wall restoration, and give your space the long-lasting finish it deserves.

Choosing the Right Drywall Contractor in Edmonton: What to Look For

Whether you’re building a custom home, renovating your space, or upgrading your commercial property, selecting the right drywall contractor in Edmonton can make or break your project. High-quality drywall work lays the groundwork for clean finishes, long-term durability, and better property value. In this guide, we’ll walk through the essentials of choosing a reliable contractor and what to look for during your decision-making process.

Why Hiring a Professional Drywall Contractor is Important

Drywall installation is not a job where you want to cut corners. Hiring a professional ensures:

– Proper drywall framing and structural setup
– Clean, even finishes with minimal repairs needed later
– Safe and code-compliant work for both residential and commercial properties

Skilled professionals can also recommend enhancements like custom wall finishes or soundproofing services that improve the comfort and value of your space.

How to Evaluate a Drywall Contractor’s Experience and Expertise

Before hiring, take the time to assess the contractor’s qualifications. Start with these two areas:

Checking Credentials:
– Ensure the contractor is licensed, insured, and familiar with Edmonton’s building codes
– Ask about warranties on workmanship and materials

Reviewing Past Work:
– Request to see a portfolio of completed projects
– Read through client reviews on local directories or home renovation platforms
– Ask for references, especially for projects similar to yours (such as new home construction or large commercial drywall jobs)

Look for signs of expert craftsmanship and consistency across projects.

Questions to Ask a Drywall Contractor Before Hiring

Asking the right questions can quickly separate experienced contractors from unreliable ones. Consider asking:

– What’s your experience with residential drywall vs. commercial drywall?
– Do you handle full drywall installation or just repairs?
– How long will the project take from start to finish?
– Are all services included in your quote (framing, taping, finishing, cleanup)?
– What kind of materials and brands do you use?
– Do you subcontract or complete all work in-house?

The answers to these questions will give you insight into the contractor’s process, reliability, and attention to detail.

Red Flags to Watch Out for When Hiring a Drywall Contractor

Not all drywall contractors operate with the same level of professionalism. Watch out for these red flags:

Unclear Pricing:
– If a contractor can’t provide a detailed estimate, be cautious. Vague pricing often leads to surprise costs down the line.

Poor Communication:
– Missed calls, late replies, or unclear explanations can derail a project before it even begins.

Lack of References:
– A reputable contractor should have recent client testimonials and documented experience.

Inconsistent Scheduling:
– Delays in starting or unexplained rescheduling may indicate issues with organization or overbooking.

Protect yourself and your investment by choosing a trusted contractor with a clear track record in Edmonton home renovations.

The Cost of Hiring a Drywall Contractor in Edmonton

Drywall service pricing can vary based on project scope, materials, and location. Here’s a breakdown of what to expect:

– Small patch jobs or repairs: Lower cost but depends on accessibility and finish requirements
– Full drywall installation for a room: Pricing may vary depending on square footage and wall features
– Custom finishes or soundproofing: These will increase the price but also enhance functionality
– Commercial drywall projects: Typically quoted based on volume, timeframe, and complexity

Always request a detailed quote that outlines material costs, labor, timelines, and any optional upgrades.

Conclusion

Hiring the right drywall contractor in Edmonton is about more than just the lowest quote. It’s about finding a team that combines skill, communication, transparency, and a commitment to high standards. Whether you’re tackling residential upgrades or full-scale commercial drywall work, choosing a contractor with a reputation for professionalism can save you time, money, and stress.

Look for licensed and insured contractors with strong local experience, and don’t hesitate to ask the important questions. With the right team on board, your next drywall project will be smooth from framing to finish.

General Contracting Services Explained: From Planning to Completion

Understanding General Contracting

general contractor plays a vital role in residential and commercial construction, overseeing the entire project from planning to completion. Whether you’re working on home remodeling and renovations or custom home building, hiring a qualified contractor ensures the process runs smoothly.

What is General Contracting?

General contracting involves managing all aspects of a construction project, including labor, materials, permits, and quality assurance. Contractors coordinate with subcontractors to ensure every phase is executed efficiently.

Role of a General Contractor in Construction Projects

  • Project Planning & Budgeting – Managing timelines and cost estimation.
  • Permitting & Compliance – Ensuring projects meet local building codes and regulations.
  • Supervision & Quality Control – Overseeing subcontractors and guaranteeing quality work.

Difference Between General Contractors and Subcontractors

  • General Contractor – Oversees the entire construction project, managing planning, execution, and completion.
  • Subcontractor – Specializes in specific tasks (e.g., plumbing, electrical, roofing) and is hired by the general contractor.

Key Phases of a General Contracting Project

Understanding the phases of construction management ensures better project planning and execution.

1. Planning and Design Phase

  • Defining project scope, materials, and layout.
  • Budgeting & Cost Estimation to align financial expectations.
  • Selecting sustainable building materials for efficiency.

2. Permitting and Approvals

  • Securing necessary construction permits.
  • Complying with local zoning and safety regulations.

3. Construction Execution and Supervision

  • Managing labor, materials, and subcontractors.
  • Monitoring quality assurance in construction to meet industry standards.
  • Handling Roofing and Flooring Services, interior, and exterior renovations.

4. Project Completion and Final Inspection

  • Conducting thorough inspections to meet quality assurance standards.
  • Ensuring final touch-ups and client approval.
  • Delivering a fully completed project with proper documentation.

Common Challenges in General Contracting

Construction projects often face hurdles that require professional expertise to navigate.

1. Budget Overruns and Cost Control

  • Unexpected material costs and labor expenses.
  • Effective project budgeting helps mitigate financial risks.

2. Delays and Timeline Management

  • Weather conditions, supply chain issues, and contractor scheduling.
  • Hiring a licensed contractor improves adherence to the construction timeline.

3. Ensuring Compliance with Building Codes and Regulations

  • Avoiding legal issues and safety violations.
  • Working with certified general contractors ensures adherence to standards.

When to Hire a General Contractor

DIY vs. Hiring a Professional General Contractor

  • Small cosmetic upgrades can be DIY-friendly, but large-scale projects require professionals.
  • General contractors handle complex elements like project planning, compliance, and subcontractor management.

How to Choose the Right Contractor for Your Project

  • Verify licenses and insurance.
  • Check customer reviews and past project portfolios.
  • Ensure expertise in interior and exterior renovations or custom home building as per your needs.

Questions to Ask Before Signing a Contract

  • What is the estimated timeline for the project?
  • How will budgeting and cost estimation be handled?
  • What warranties and quality assurances do you provide?

Conclusion & Call to Action

Hiring a general contractor ensures seamless project execution, adherence to quality standards, and compliance with building codes. Whether you’re planning a home renovation, custom home build, or commercial constructionBakir Contracting provides reliable expertise in general contracting services.

📞 Get in touch with us now! https://bakircontracting.com

A Comprehensive Guide to Finding a Reliable and Experienced General Contractor

Finding the right general contractor for your construction, remodeling, or renovation project can make all the difference in ensuring a smooth and successful build. Whether you’re planning a home remodeling, kitchen renovation, or foundation repair, working with a licensed and experienced contractor ensures quality results and compliance with building codes. Here’s everything you need to know about choosing the best contractor for your needs.

What is a General Contractor?

general contractor oversees construction and renovation projects, coordinating various trades, managing permits, and ensuring the project runs on time and within budget.

Key Differences Between a General Contractor and a Subcontractor

  • General Contractor: Oversees the entire project, from planning to completion, handling all aspects of construction and subcontractor coordination.
  • Subcontractor: Specializes in specific tasks (e.g., plumbing, electrical work) and is hired by the general contractor to complete particular portions of the project.

Why Hiring a Professional General Contractor Matters

  • Ensures compliance with local building codes and regulations.
  • Provides a structured approach to project management and scheduling.
  • Manages construction permits and inspections to avoid legal issues.

Key Factors to Consider When Hiring a General Contractor

Before hiring a contractor, consider the following:

1. Checking Licenses and Certifications

Ensure the contractor is licensed and registered in your area. Licensing guarantees that they meet industry standards and regulations.

2. Verifying Insurance and Liability Coverage

A reputable contractor should carry general liability insurance and workers’ compensation insurance to protect against accidents or damages.

3. Reading Customer Reviews and Testimonials

Look for reviews on platforms like Google, Yelp, or the Better Business Bureau to gauge customer satisfaction and past performance.

Questions to Ask Before Hiring a General Contractor

When evaluating potential contractors, ask these important questions:

  • How long have you been in business?
  • Can you provide references from past clients?
  • What is your estimated project timeline?
  • What are your payment terms and conditions?

These questions help determine the contractor’s experience, reliability, and financial expectations.

Common General Contracting Services

Residential Construction and Remodeling

Whether you’re planning a kitchen renovation, bathroom upgrade, or full home remodel, a general contractor ensures the project is completed efficiently and up to code.

Commercial Construction and Renovations

From office spaces to retail storefronts, experienced contractors handle commercial construction projects with careful planning and execution.

Custom Home Building

If you’re building a custom home, a general contractor manages every stage, from design approvals to final construction.

Interior and Exterior Renovations

This includes foundation repair, roofing, siding, flooring, and other structural and aesthetic improvements.

Benefits of Hiring a Licensed and Insured Contractor

Working with a licensed professional ensures:

  • Compliance with local building codes to avoid fines or project delays.
  • Protection against liability in case of workplace injuries or damages.
  • Quality workmanship backed by guarantees and warranties.

How to Avoid Contractor Scams and Red Flags to Watch For

Warning Signs of an Unreliable Contractor

  • Lack of proper licensing and insurance.
  • Vague or verbal-only contracts.
  • High-pressure sales tactics.

How to Spot Lowball Estimates and Hidden Fees

  • Unrealistically low bids may lead to subpar materials or unexpected costs mid-project.
  • Always get a detailed written contract outlining labor, materials, and payment schedules.

The Importance of Written Contracts

A contract protects both parties and sets clear expectations for the project’s scope, budget, and deadlines.

Cost of Hiring a General Contractor & Budgeting Tips

Average Pricing for Different Types of Projects

The cost varies based on project size and complexity:

  • Kitchen renovations: $15,000 – $50,000+
  • Bathroom remodels: $10,000 – $30,000+
  • Foundation repair: $5,000 – $20,000+

Tips for Negotiating a Fair Contract

  • Get multiple quotes to compare pricing and services.
  • Clarify payment schedules and milestone-based payments.
  • Ask about cost-saving alternatives, such as energy-efficient home improvements.

FAQs About Hiring a General Contractor

How do I find a trusted contractor near me?

Search online directories, check customer reviews, and ask for referrals from friends or family.

What should be included in a contract?

A contract should outline scope of work, materials, timelines, payment terms, and warranty details.

How long does a construction project typically take?

Timelines vary based on project complexity, but a clear timeline should be provided before work begins.

Conclusion & Call to Action

Choosing the right general contractor is key to a successful project. By following these guidelines, you can ensure a stress-free experience with quality results.

At Bakir Contracting, we specialize in residential and commercial construction, home remodeling, kitchen renovations, and foundation repair in Edmonton. Contact us today for a free consultation and expert guidance on your next project!

📞 Get in touch with us now! https://bakircontracting.com